If your foxbody interior is a mess with years of wear-n-tear and neglect, you’re not alone. It’s not like these things had quality interiors, let’s be honest. The plastic is thin, door panels are essentially cardboard and not a lot of people stick to the small stock speaker sizes. The good news about the 80’s Mustang interiors is they’re pretty simple to gut, clean, restore and put back together.
First thing is to find out what you want to achieve? Stock interior be it red, blue, grey, black or are you doing a black conversion? Once you know you’ll be able to piece together what you need to restore or swap your interior so you can hunt for all the parts before taking apart your fox!
Notes on the black conversion
There’s no doubt that a black interior looks great but there two things I’d like to point out. A few things changed from your stock non-black to factory black interiors on the aero nose foxes – assuming you have a year where no black option was offered (87-89). First, the 1/4 panels will have the seat belt holes in the wrong place! You either have to cut a hole in the panel (why would anyone do that?) or weld in a new seat belt location which I’d never recommend anyone doing – messing around with this could put you and your passenger in danger. The other note is the dash itself, the OE black dash will come from an airbag car so the fuse block will need some modifying to work which is doable. Personally, I’m not a fan of doing any of this and rather paint the main dash and 1/4 panels to match. If you have an airbag fox, you’re in good shape to swap the parts over, it’s a direct swap.
We often see painted interiors that look bad, either too glossy of a paint was used and the prep was so bad that the paint would peel off from just looking at it wrong. I would argue, for black conversions, you find high-use parts in black such as the kick panels, scuff plates, console, dash pad and HVAC vents. The rest is pretty easy to paint and match factory OE black. Despite people providing negative feedback on this, it can look extremely good.
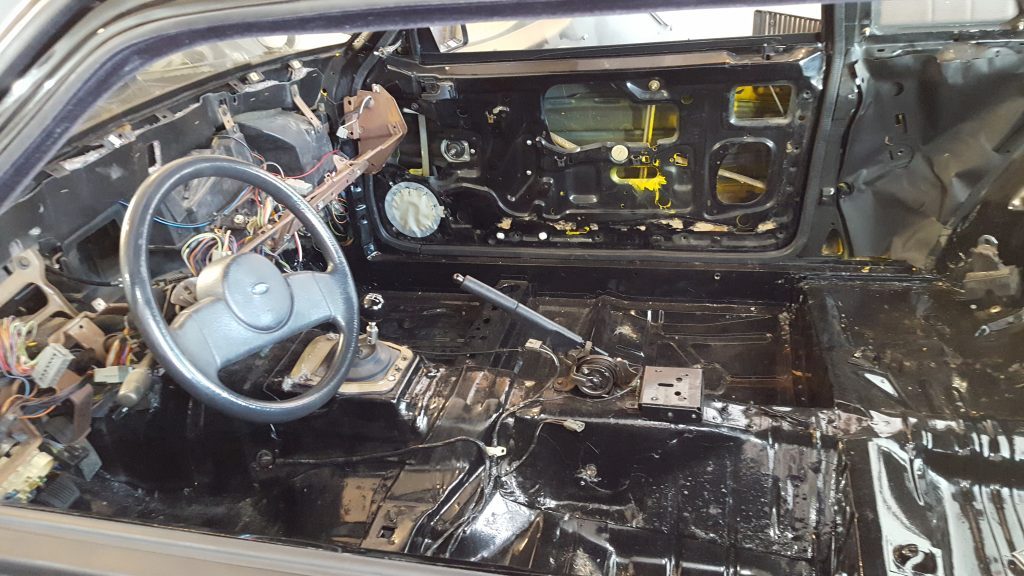
Gutting
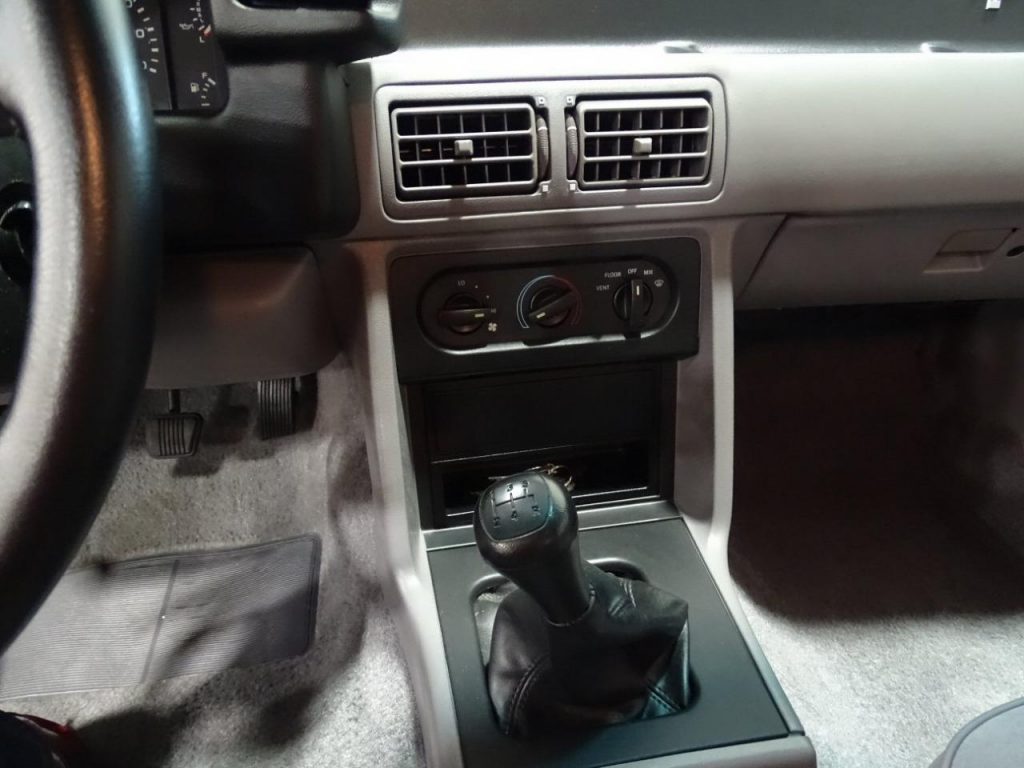
This is rather simple but still take your time to not break things and if you don’t already have a tool for removing those plastic clips found in places like door panels, go and get one similar to this. I also suggest you go to a dollar store and pick up some sort of crafts storage bins for all the screws (be sure to label things). Start by removing the front seats, rear seats, dash panels and glove box, steering covers, console (arm rest, console cover, shifter bezel), kick panels, scuff plates, carpet, 1/4 panels, window trim, headliner, etc…
The dash isn’t too bad to remove (if needed), after removing the cluster bezel, speaker covers and instrument panel, most of the screws should be exposed. I normally just remove the plastic from the frame. Be sure to take a lot of photos, not that there’s a lot of wires to disconnect but taking notes and taking pics will help a lot especially if this is a long-term project (we tend to forget where things go). At the same time, replace your heater core while everything is exposed – even if it isn’t leaking.
Assembling the parts
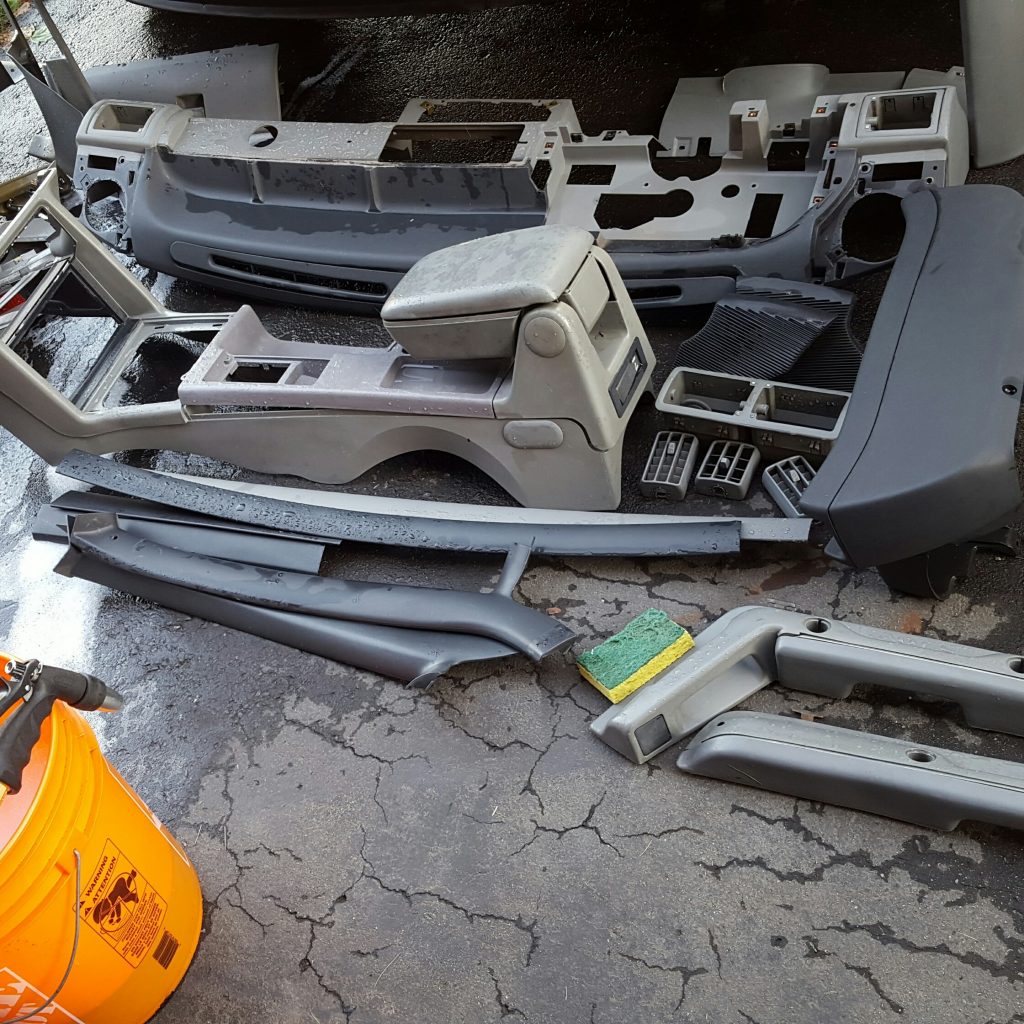
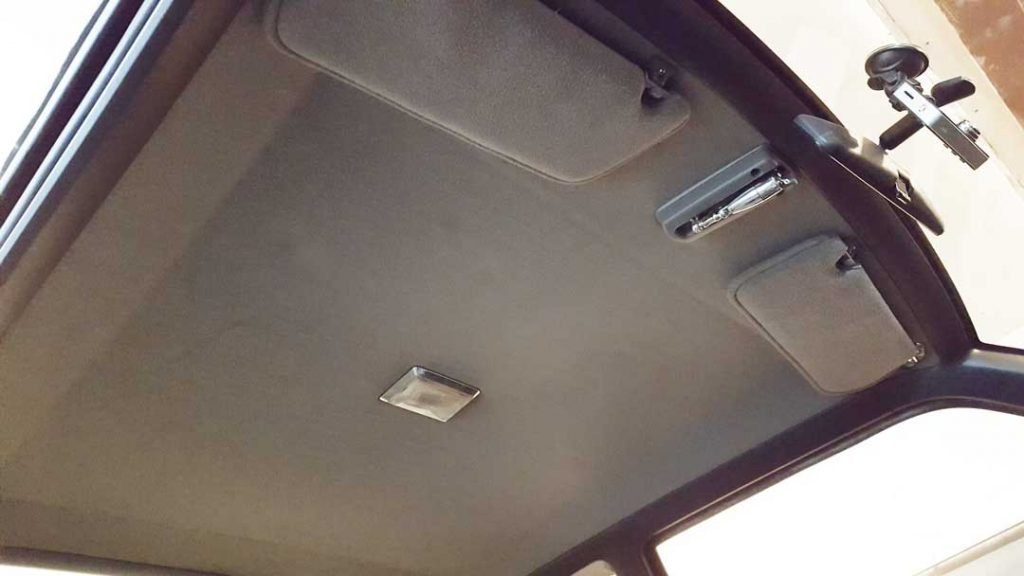
Make an inventory of what you have and what you need to restore your interior. Online stores like LMR have a lot of restoration parts available and I always recommend getting the interior screw kit, extra door panel pins, etc… for my most recent restoration I ended up buy new: Headliner, rear window tray, carpet, seat belt sleeves, pretty much everything LMR had for a smoke grey interior. One thing I’d like to point out, the ashtray door is plastic, not aluminium like factory! I also suggest new headliner and carpet, it makes a big difference.
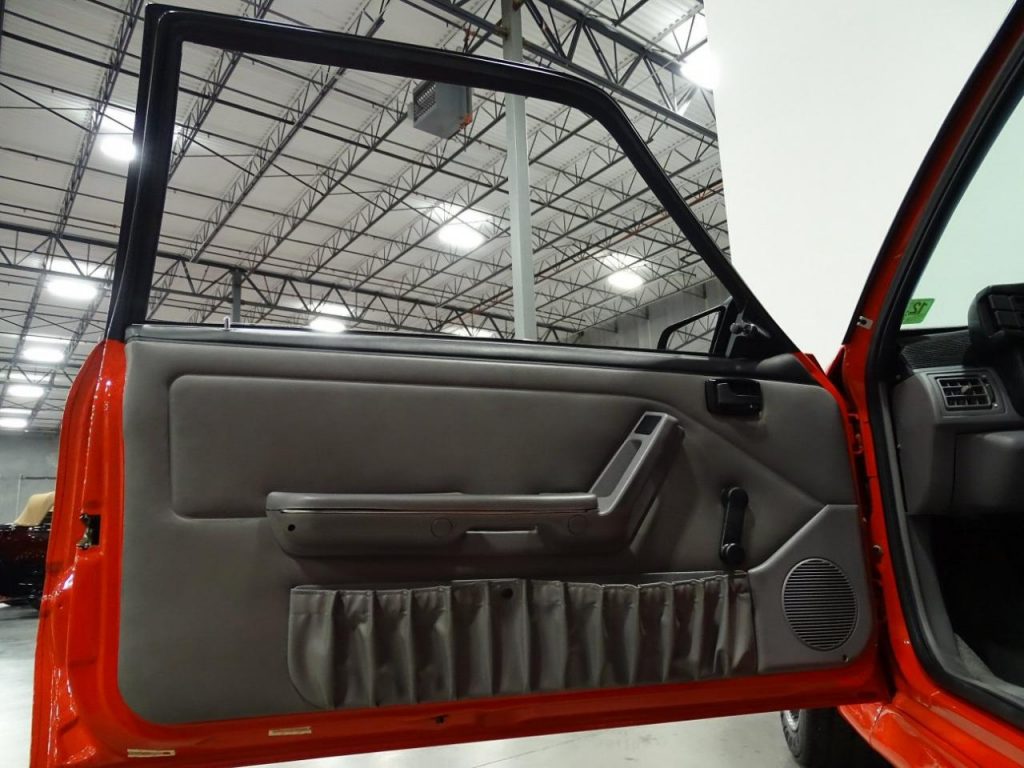
Door panels
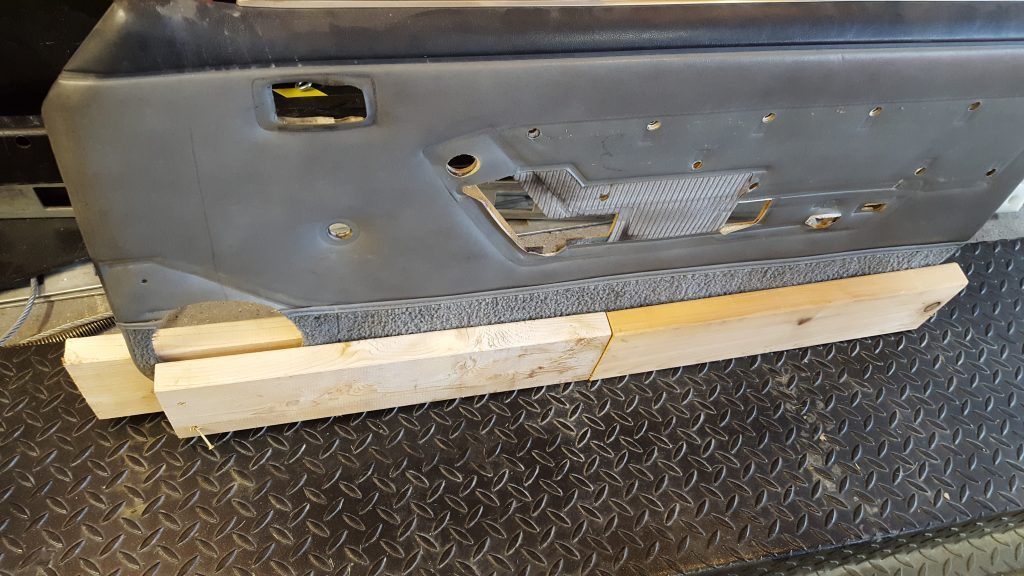
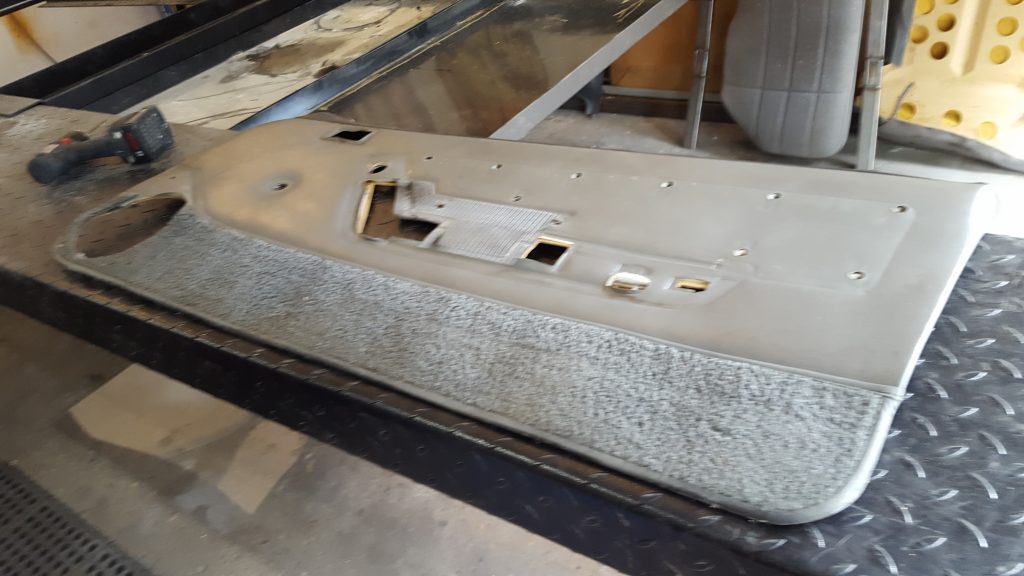
Our door panels are backed with essentially cardboard so any sort of humidity and it’s warp city. If the warping isn’t too bad, you can make a jig out of 2×6’s and with use of steam and time, the panels can be un-warped. Below is how I restored an extra set of door panels. I steamed the cardboard backing and applied the wooden jig for a week or so. Although not 100% perfect, the door panels are much straighter than before.
After removing the 2×6’s.
Refreshing parts with a light coat of paint
It is possible to find a mint interior, but not as easy as it once was. Applying a coat of SEM plastic paint can really make your interior look factory fresh. Paints designed for plastics will have etching chemicals for the paint to adhere to the surface. Keep in mind that injection molded plastics are heated (friction heat from the mold) to the point where any future etching won’t work well because the surface will be crosslinked or glazed and that’s resistant to etching! Which is why I recommend using OE black parts for high-use things.
Cleaning up: Start by cleaning the parts with Dawn dish soap, get a nylon brush to get the crap out of the texture. This is especially easy with everything out of the car. Also clean up your work space, dust is your enemy.
Prepping the plastic: You’ll need chemicals like SEM’s vinyl and plastic prep products. Also care to actually read the instructions. I also like to use a 3M tack cloth to pickup any dust or residue. This may sound bad but keep your greasy fingers off the prepped surfaces!
Painting: Although I’ve never tried some people like the LMR paint offerings (they tell me it’s SEM paint anyway). For the smoke grey interior, luckily for you off-the-shelf Presidio (15163) is a 99.9% match as you can see below.

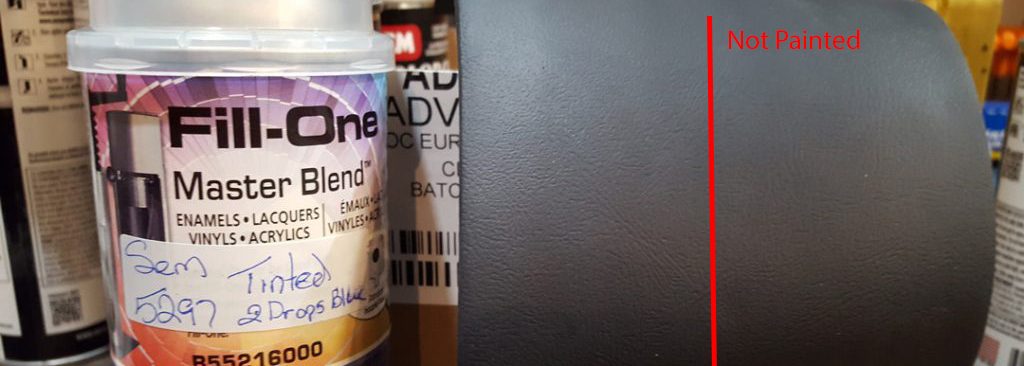
The upper dash is a bit tricky, you could get a custom colour made and what worked well for me so far was SEM 5297 with additional drops of blue, I’d say it’s about 95% accurate and the sheen is up to you. I like the flat sheen but you can test it with semi-flat clear coat on scrap pieces.
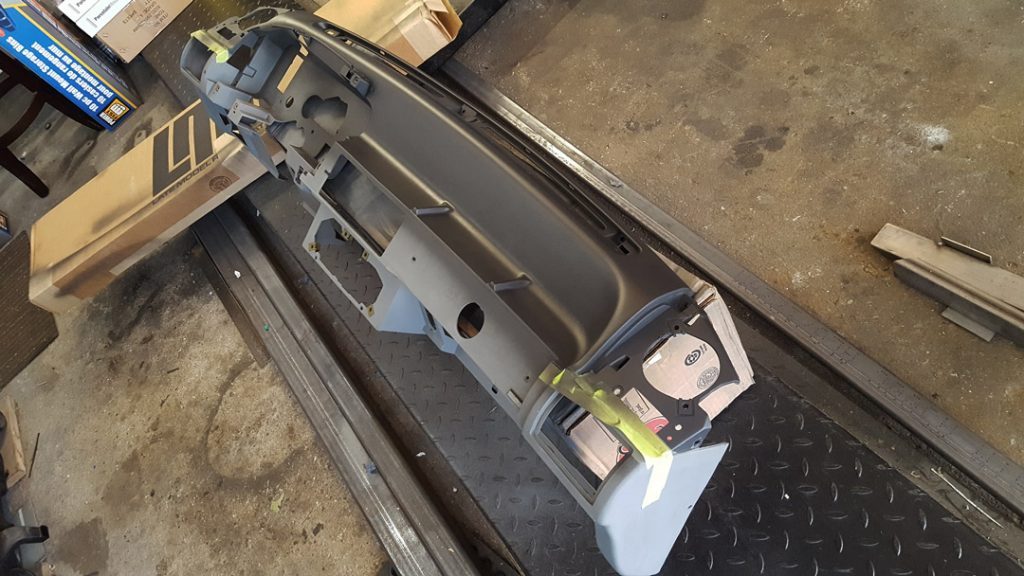
Here’s the upper dash freshly painted
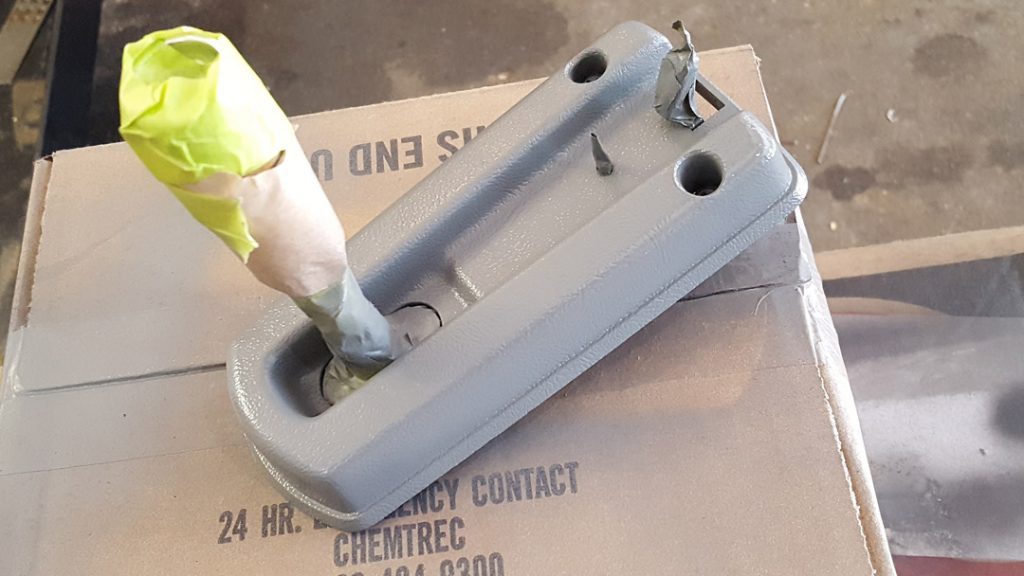
Even the strange map light is masked and painted, since these things seem to turn green over time?’
Putting it back together
It makes a big difference to detail everything before installing it and it is extremely time consuming. As you can see the factory smoke grey interior starting to get pieced back together below. Again, if you organised everything or even purchased LMR’s interior screw kit – things will be much easier for you. I’d like to point out to put the insulation pieces back in, and look out for areas that had/has felt to prevent noise like the A-pillar plastic trim pieces. If you’re like me and dump each screw and bolt into one bucket… Bolts/screws that originally went in plastic had wide threats to kind of give you a hint. There’s a lot of screws with drill points and sometimes the rear panels don’t fit exactly as it did before. I’ve sometimes created new holes using the screws, rarely but it does happen.
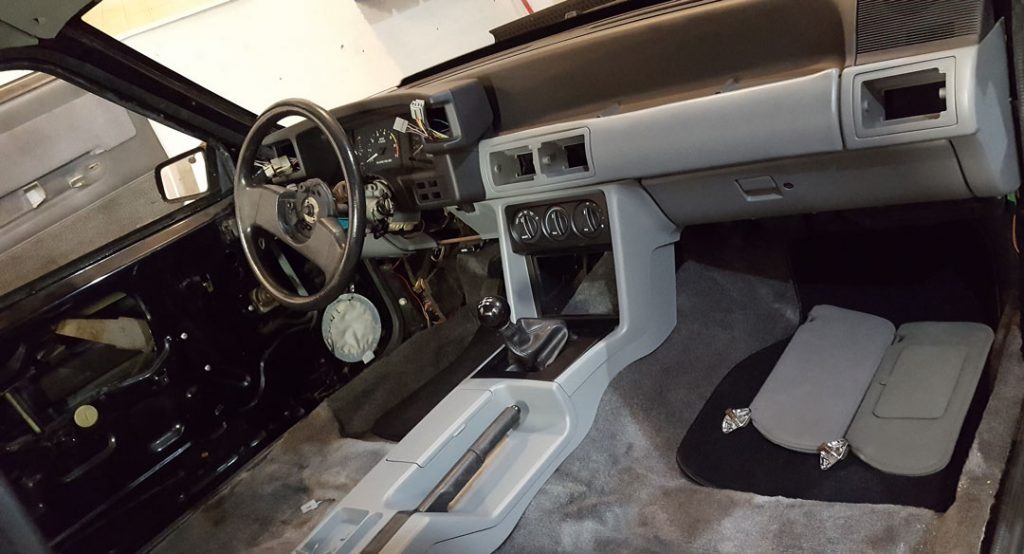
And when you start adding new headliners, carpets, etc… The results are pretty much immediate. Headliner should go in before the seats and for a coupe, yes it does fit through the doors, just need to play with it a little.
Seats
Most of your interior’s surface area is found on the seats so skipping this will ruin your interior. It’s best that the seats match the interior and feel free to share ideas on FoxStang’s Facebook page. You can find a set of used seats that are in great shape but to be 100% “mint” getting it upholstered is your best bet and this is accessible with kits you can buy at LMR for example. Below is a picture of custom upholstered seats, only difference from factory are the french stitching.
Door panel inserts
From factory these matched the material on the seats. If you have plain LX low back seats, the inserts will have the same material. If you have leather, the inserts will also be leather (or at least match it with vinyl). If you change your seats, even custom like perforated leather – make sure to do the same treatment to the door inserts. It’s a detail that will go a long ways.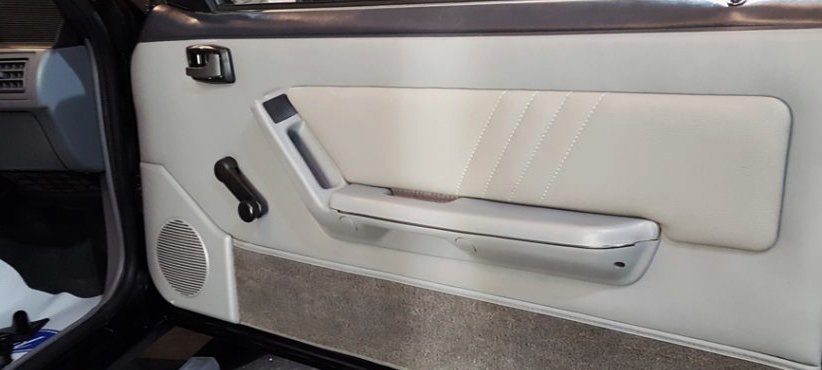
Radio option
If you want to remove a walmart type single din unit and go with a factory unit for that extra detail. Look at the door vin decal (driver door), hopefully it’s still there. Under (R), you will have either a digit or the letter “Y”… Y means it’s a factory radio delete. Radio codes change from year to year but these are 1992 options:
              5     Radio Premium AM/FM Stereo Disc
              6     Radio AM/FM/MPX, Electronic Premium Cassette
              7     Radio AM/FM/MPX, Cassette
              8     Radio Premium AM/FM Clock Cassette
              9     Radio AM/FM, Clock Cassette Electronic Tune
              F     Radio AM/FM Stereo-Electronic
              H     Radio AM/FM Stereo/Cassette, Electronic
              Y     Radio Delete
In conclusion
Take your time, have a plan, an idea on how you want the interior to look like. I suggest you have all the parts lined up before starting to avoid having to wait 6 months to get it all done. Below are some pictures of factory mint fox interiors for inspiration and how it once looked.
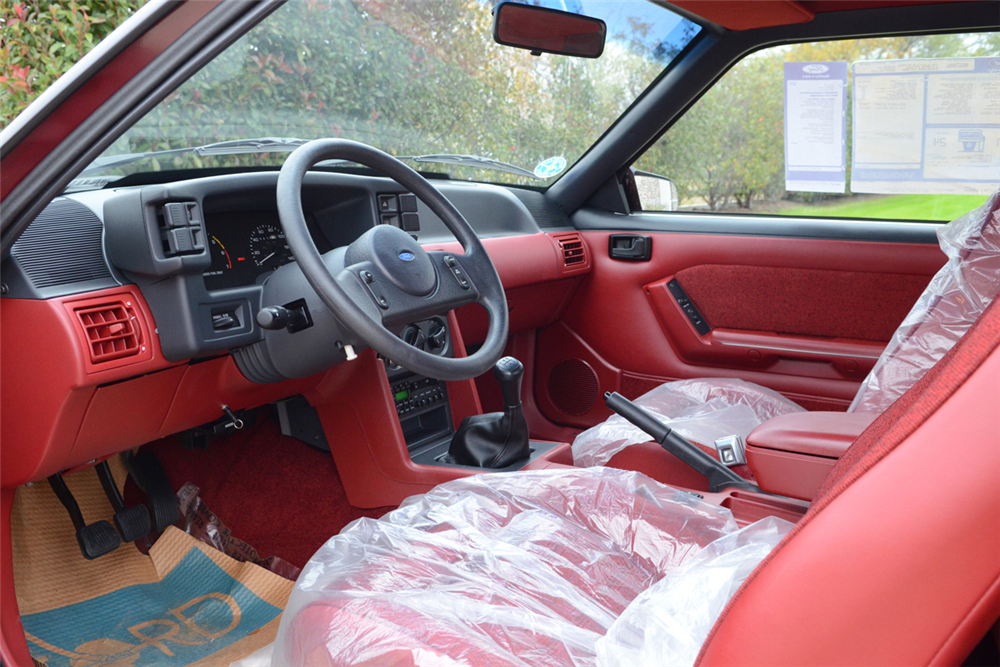
Sweet porno red interior
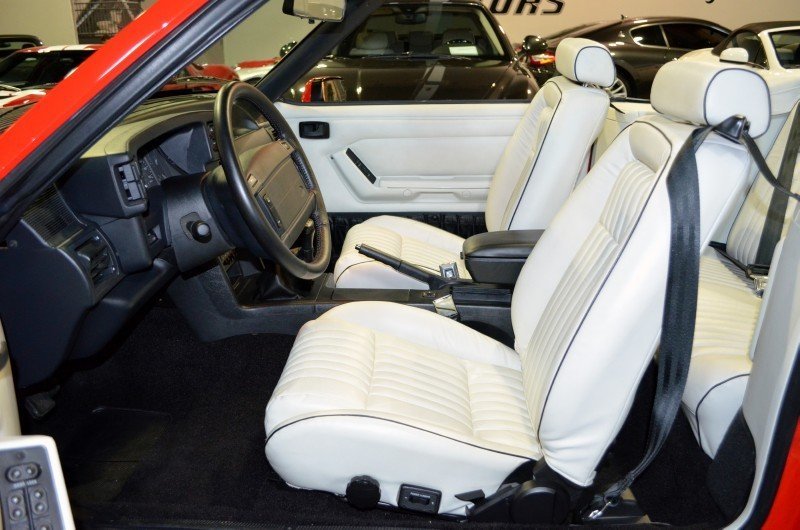
Black and white convertible interior
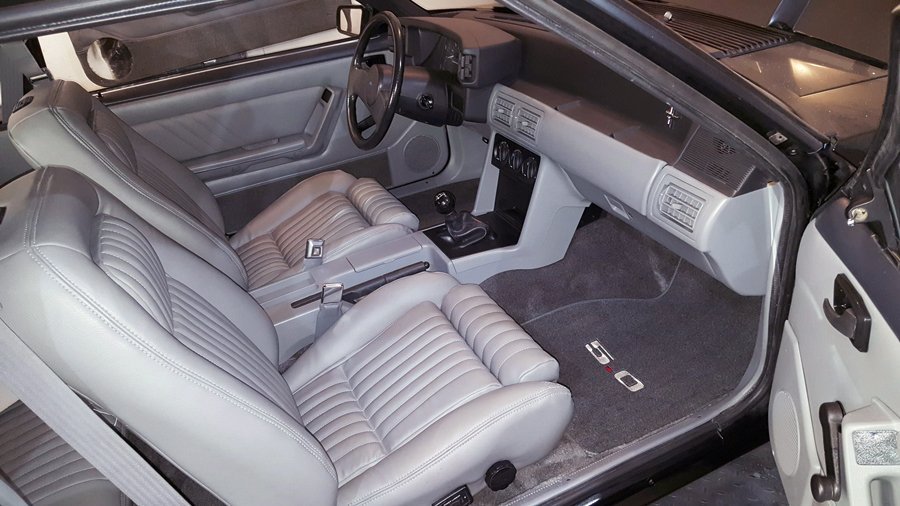
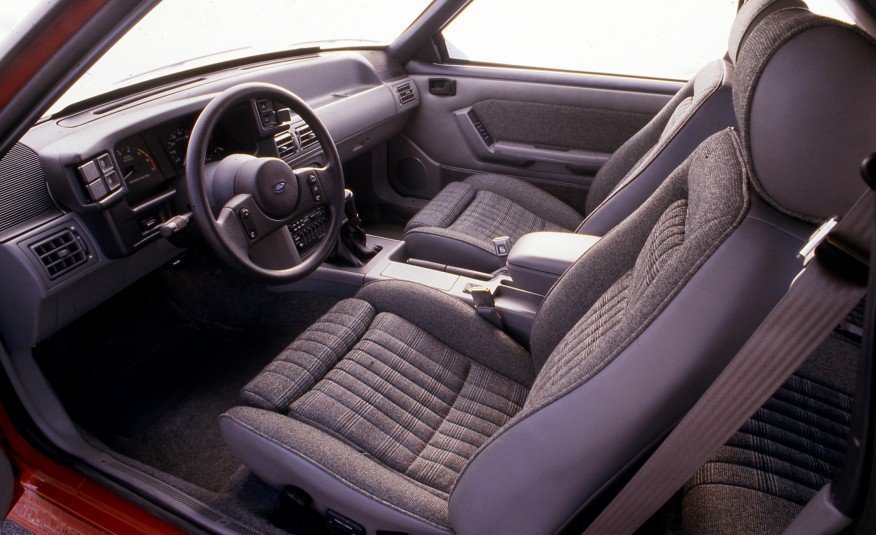
Tweed seats and smoke grey interior
Cobra R door panel
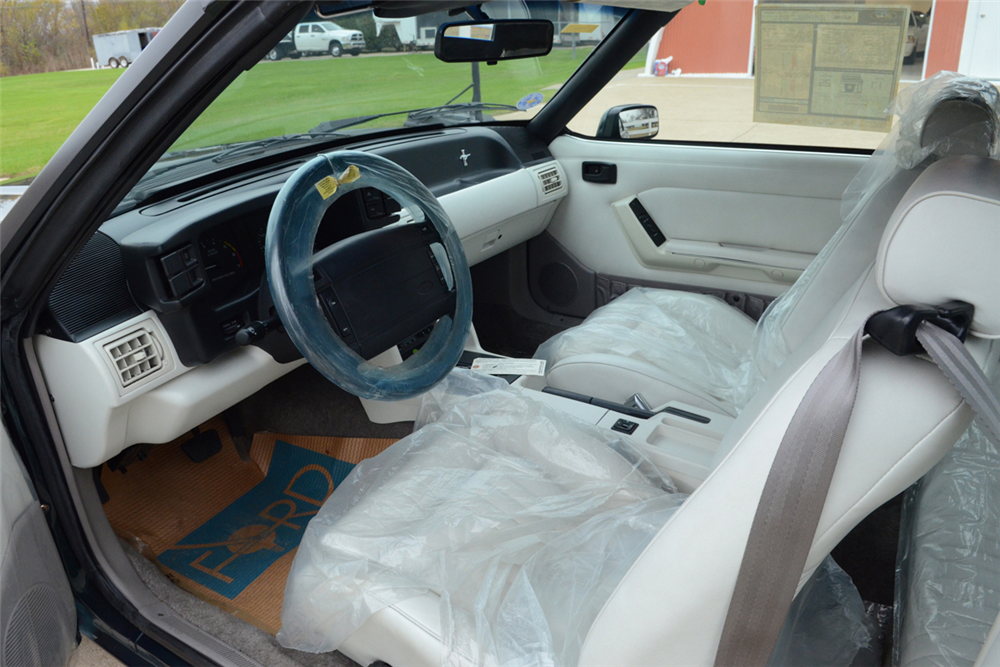
Another white interior, on a 7up Convertible
Cobra R, radio delete panel

That’s good to know that you can find kick panels, scuff plates, console, dash pad, and HVAC vents in black if you are upgrading or fixing the interior. My dad has an old car he’s been working on and trying to redo the interior and he would really like black inside. I’ll have to see if I can get him some of this for his specific car model to make sure it’ll fit correctly.